

OnSIP’s softphone app enables our customers to make and receive work calls, play and delete voicemail messages, view the presence statuses of their coworkers, and much more, all from a web browser window or desktop application on their computers.
We’re excited to announce that the OnSIP web app also hosts the Billing section of our Admin Portal! Account administrators can easily go from making a phone call to checking a voicemail message to downloading account invoices without having to leave the app interface.
OnSIP’s Admin Portal: The Hub for Administering Your Hosted VoIP Account
Our Admin Portal has been the location where an OnSIP Account Administrator manages his entire account, from purchasing phone numbers to configuring business phone features. From this web-based admin portal, he also has access to the billing for his account. By porting this section into our web app, we’re aiming to provide a more user-friendly and streamlined experience for account admins.
Note that the Billing section of an account is only available in the web app at app.onsip.com. Due to restrictions that are imposed by the App Store, we cannot offer this section in our desktop app. And just to mention: These billing management tools are still available in the Admin Portal if you wish to continue making changes there.
Hosted VoIP Billing: Now in the OnSIP Web App
After an administrator logs into the OnSIP web app, she can access the Billing section of her account by clicking on the Administrators tab in the top navigation bar, and then selecting Billing from the dropdown menu. From there, she can manage all aspects of her OnSIP hosted VoIP billing and payment information from a single overview.
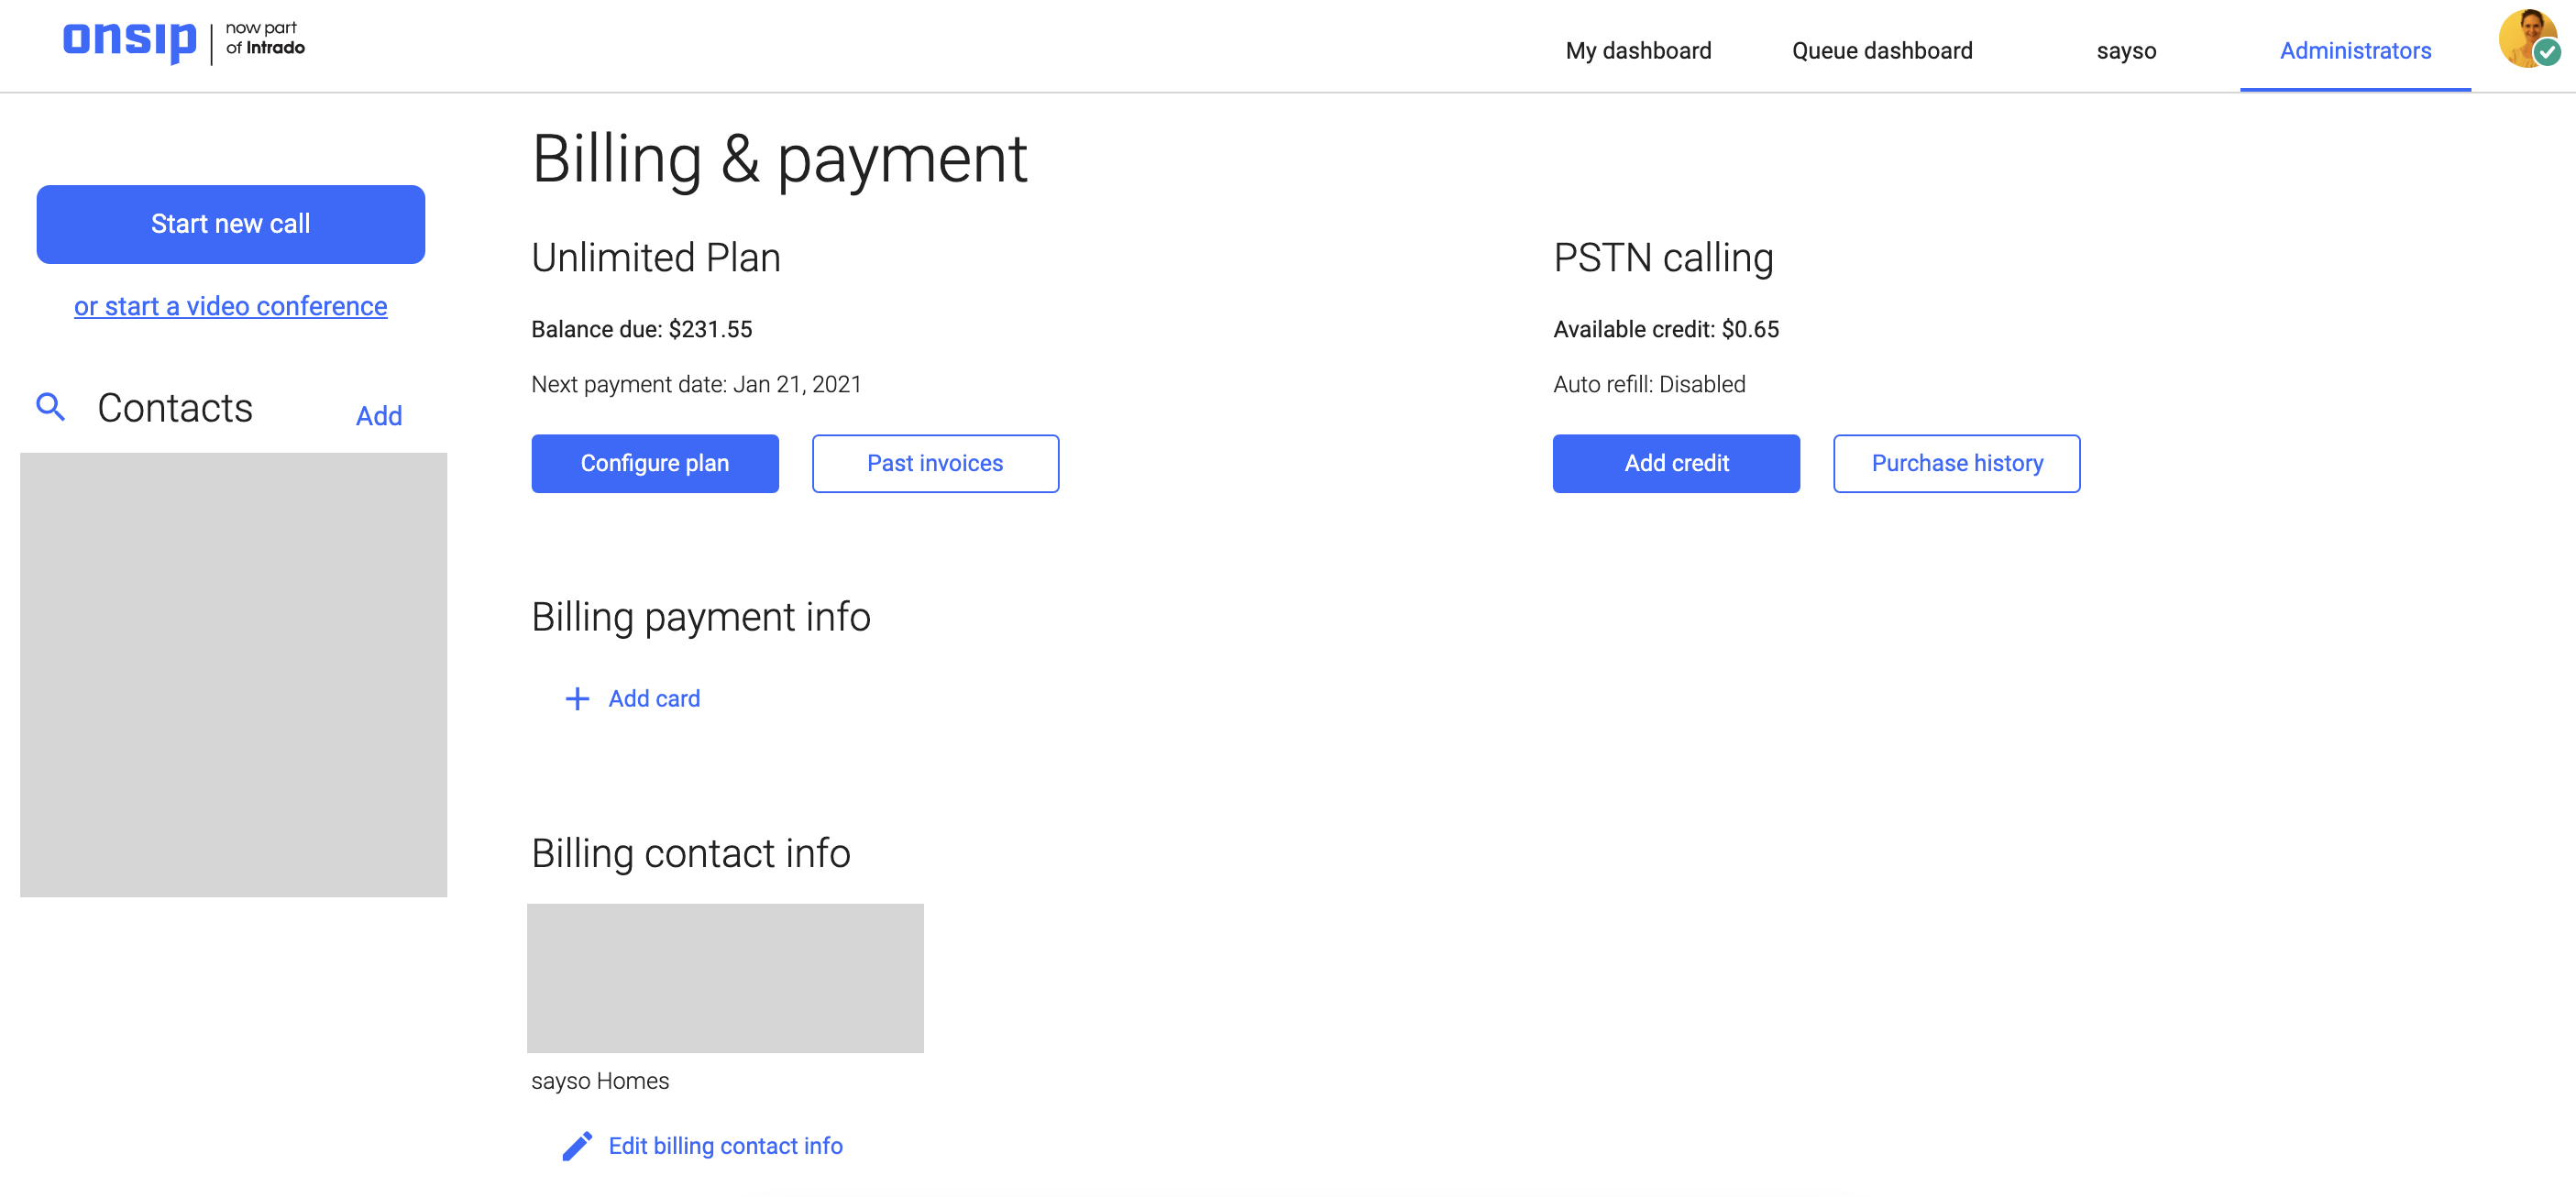
Monthly Plan
At the top of the page, you’ll see the current monthly plan that the account is subscribed to and the account’s “Next payment date.” If you created your account on February 1st, that day becomes its “birthday.” Every following month on the 1st is the day when you will be charged for your monthly billing plan, so the 1st of the month is your next payment date. Invoices are charged directly to the credit card on file on your account.
- Plan details: The Plan Details button presents granular info of your billing plan, such as its cost and included features. If you wish to change your plan, you may do so by clicking on the Change Plan button and subscribing to a different plan there. See our Pricing page for plan details, extended dialing rates, and LNP charges.
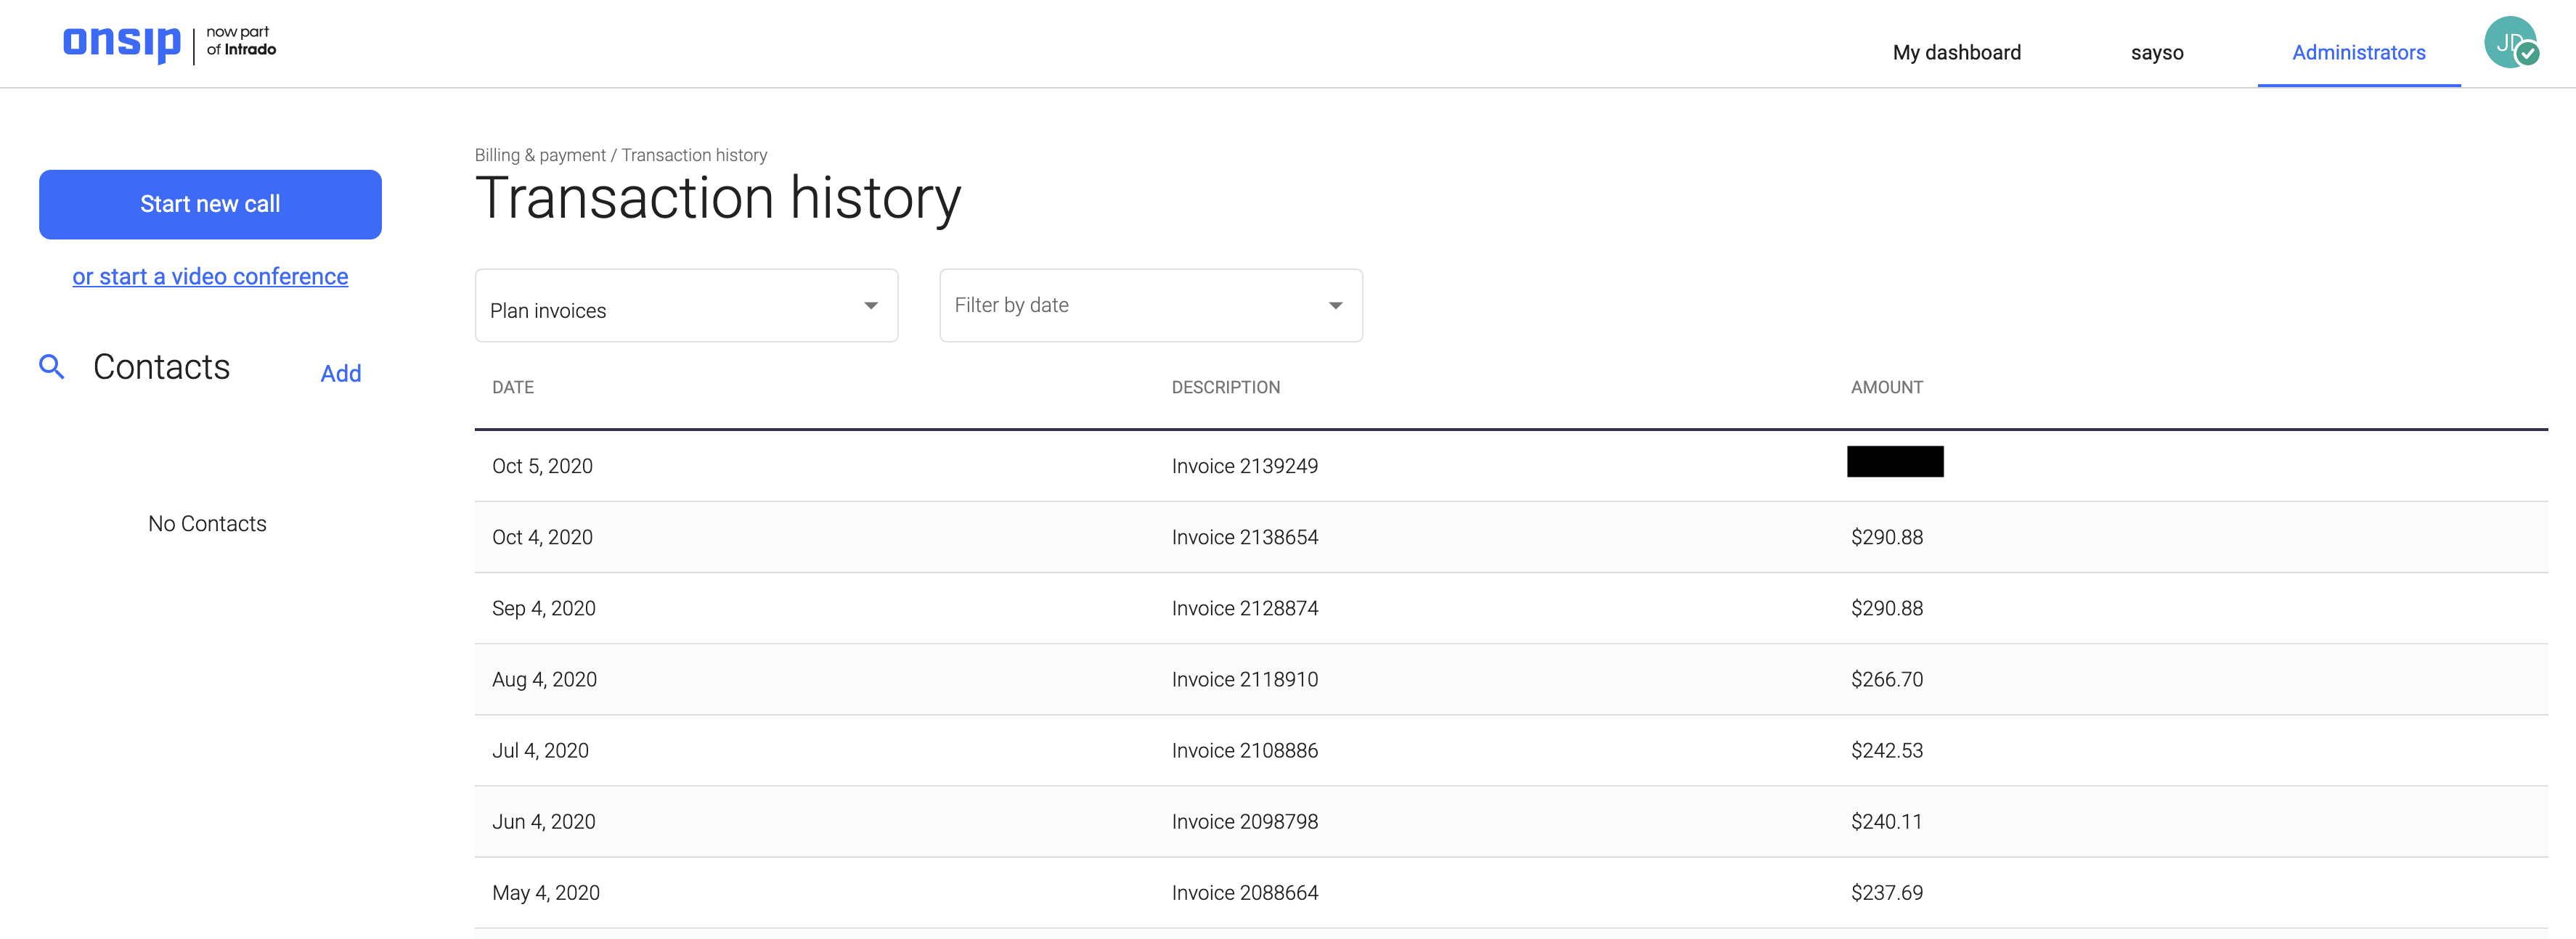
- Past invoices: The Past Invoices button presents all past invoices and payments on your account. You can filter the view by choosing a specific month, or you can display a complete list of invoices (the “All Time” option). When you click on the row of a specific invoice, the line item charges on that invoice will appear, including related taxes and fees. If you want to download that invoice for record-keeping purposes, select the Print button at the bottom for a pdf version of the bill.
PSTN Calling
The PSTN Calling area displays the current PSTN credit balance on your account. Monthly recurring charges (“MRCs”) for any phone number(s) you have get deducted from this balance. If you have toll-free phone numbers, the per minute costs for inbound toll-free calls also get deducted from this balance. And if you’re on our Basic Plan, the per minute charges for your phone calls get taken from here, as well.
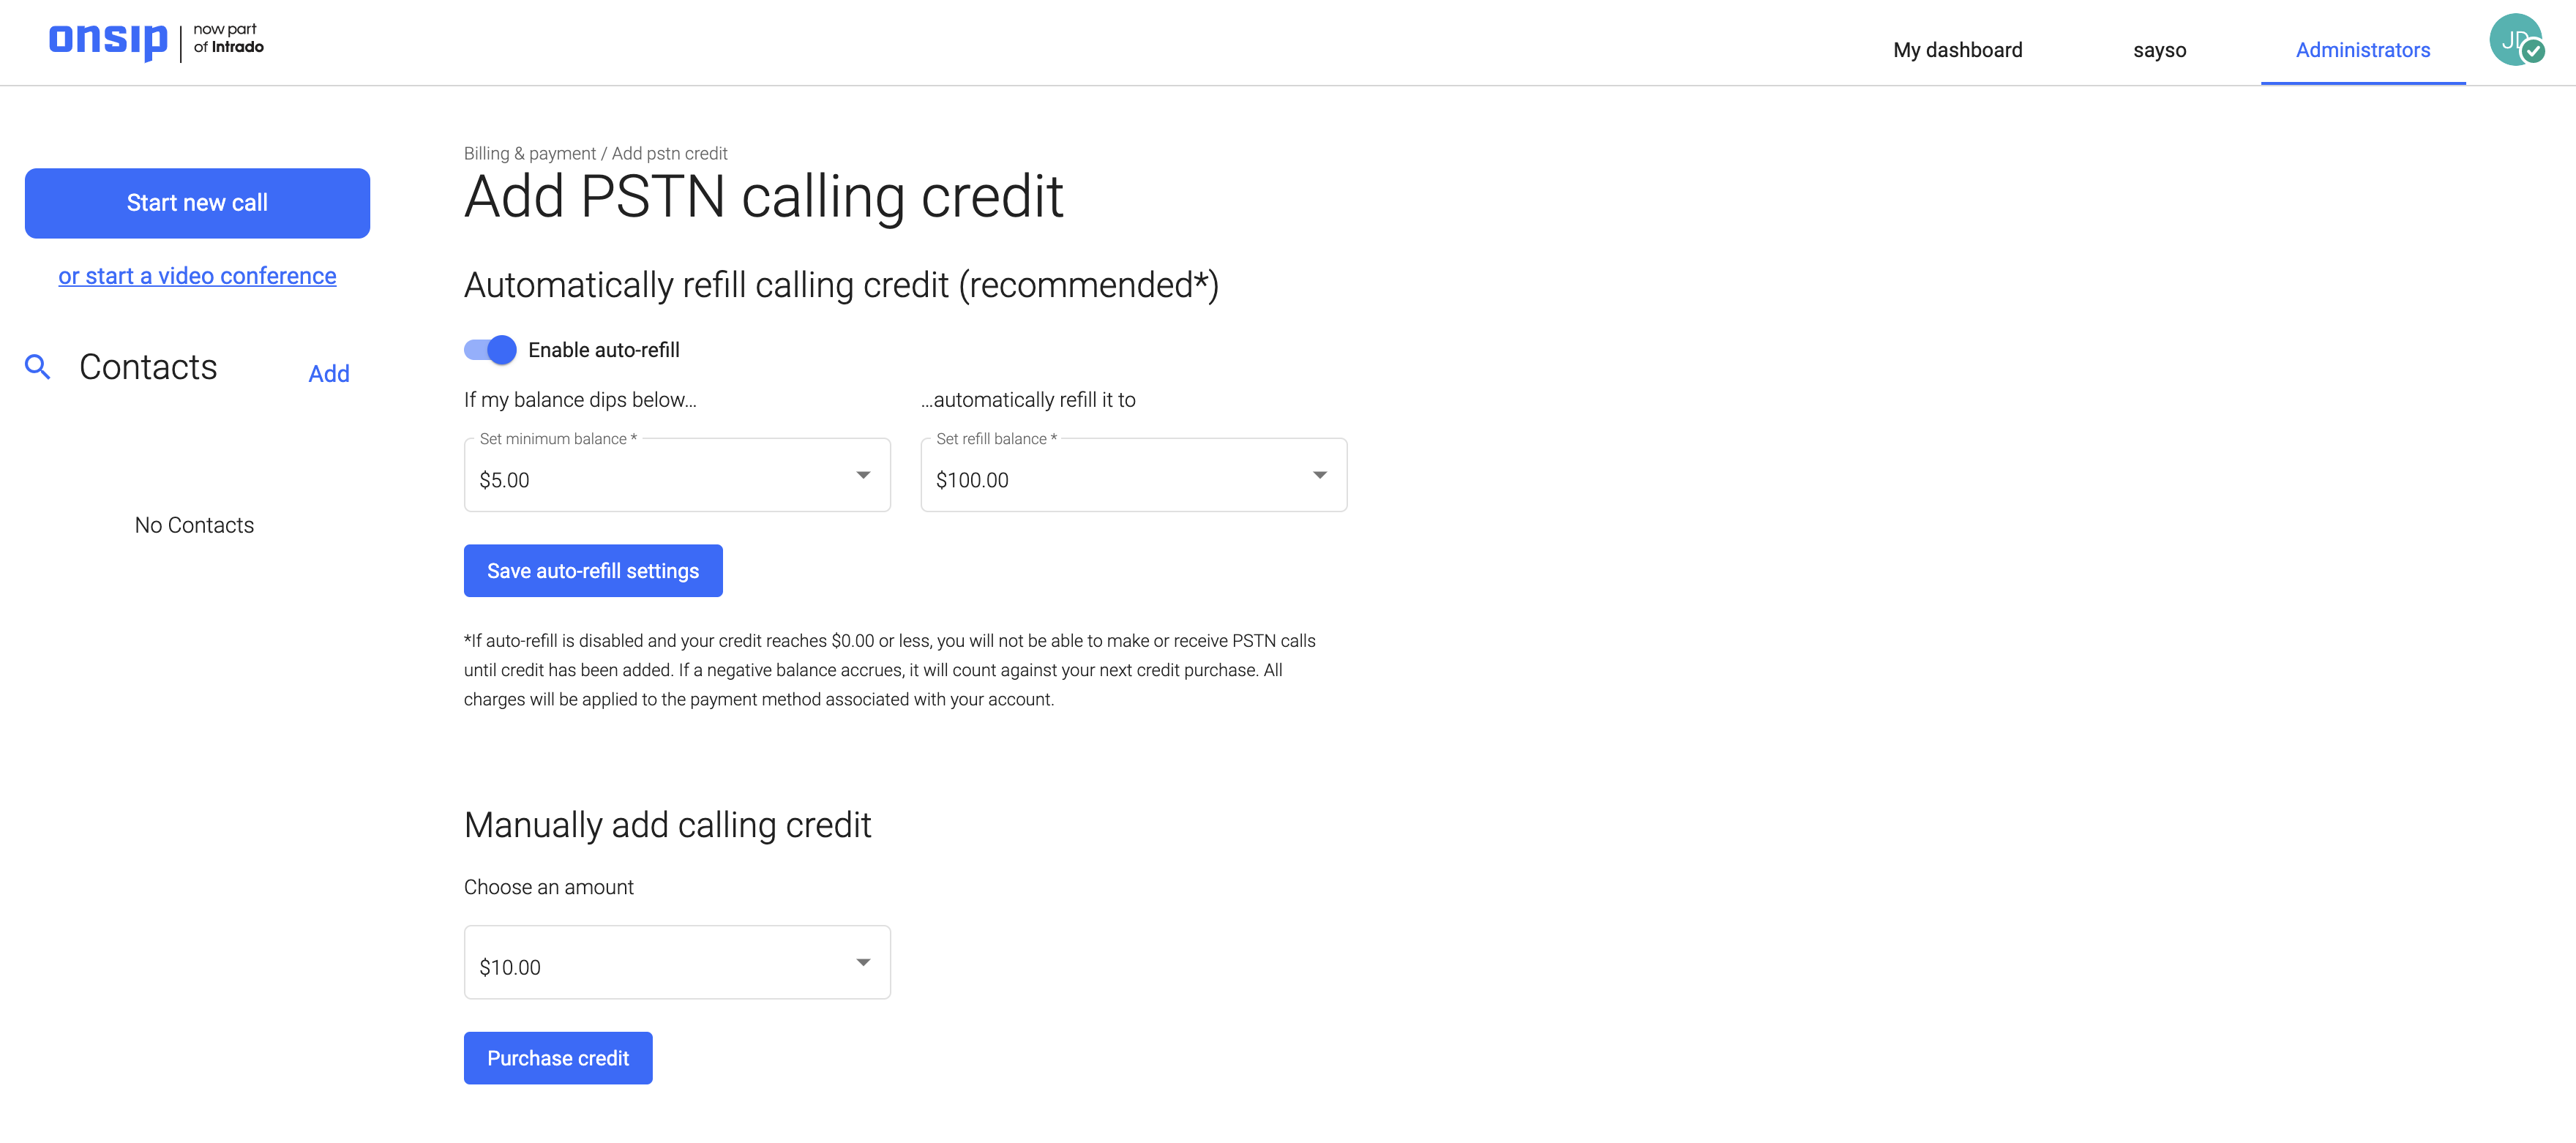
For all of these reasons, it’s important that you always keep a positive credit balance. By clicking on the Add Credit button, you’ll have two ways to add credit to your PSTN calling balance:
- Auto-refill: Our recommended option, the auto-refill feature will automatically refill the PSTN calling balance to a specific amount once it falls to a different, lower amount. Enable it by clicking on the switch for Enable Auto-Refill. You’ll then be able to select a “Minimum balance” amount and a “Refill to” balance amount from two dropdown menus there; remember to save your choices when finished. Auto-refill will trigger each time this credit balance hits the minimum balance amount, and your account’s billing contact will receive the emailed credit card payment receipt for each charge. If your card declines the charge, an emailed notification will be sent out so that you can take immediate action to resolve the situation.
- Manually add calling credit: The second option is to manually add credit to the PSTN calling balance. Simply choose an amount from the dropdown menu that you’d like to add to your balance. When you click on Purchase Credit, your selected amount will be charged to your credit card. Once the purchase is successful, that amount will be added to your PSTN calling balance, and your account’s billing contact will receive the emailed credit card payment receipt for the charge. The contact will also receive an emailed notification if your credit card declines the charge.
The Purchase History button for the PSTN Calling section displays all transactions—both credit additions and MRC deductions—made in your PSTN calling balance. You can also filter the view by choosing a specific month, or you can display a complete list of transactions (the “All time” option). Clicking on the row for each individual transaction will give you more details on it, as well as a Print button so that you can access the transaction as a pdf file.
Billing Payment Info
The Billing Payment Info section shows you the credit card that is on file for your account. All charges for your account are applied to this credit card for payment. Use this section to quickly add a new credit card to your account, update a card’s billing address or expiration date, or put a new card on file.
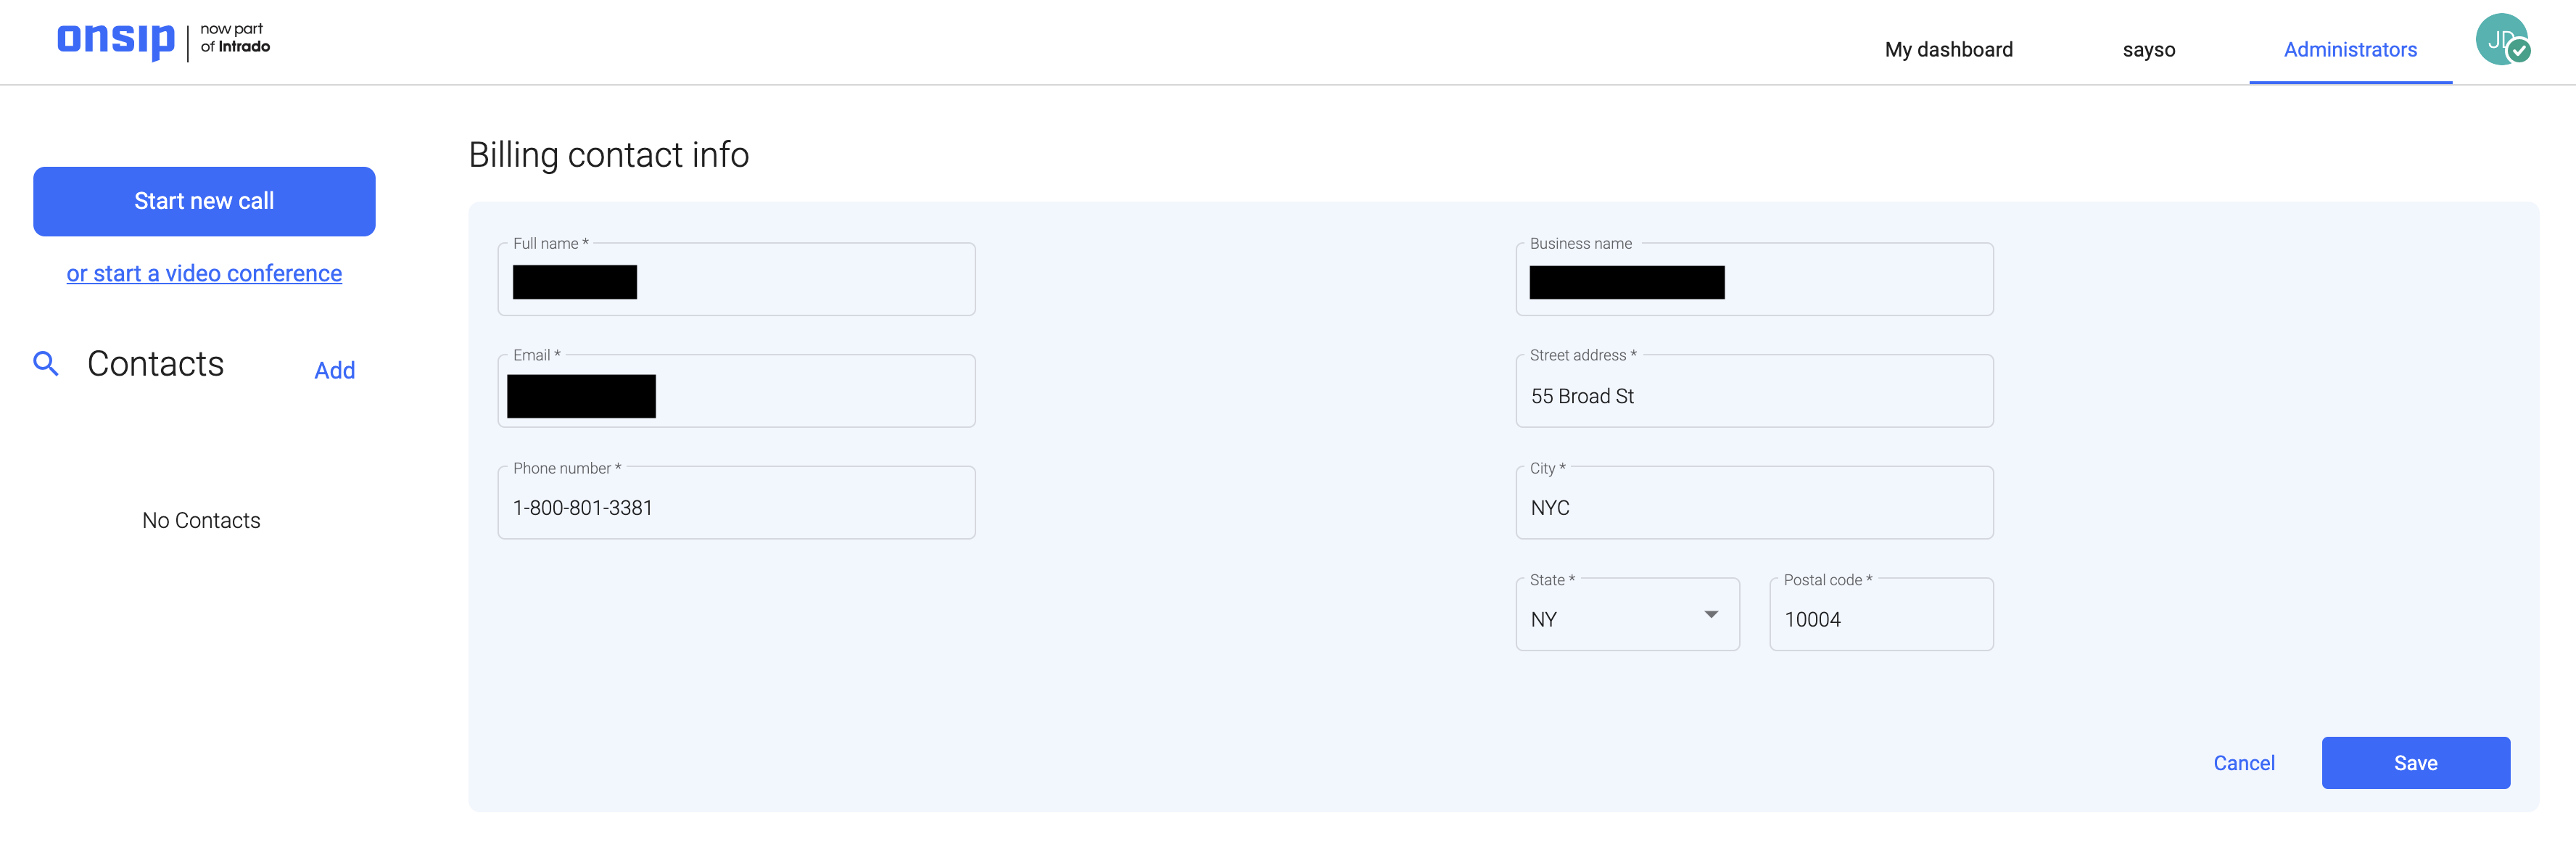
Billing Contact Info
The Billing Contact Info section displays the current billing contact of record for your account. All invoice and credit card payment notifications are sent to this contact’s email address, so it’s essential that you keep this data up to date. Just click on Edit Billing Contact Info to change the name, email address, phone number, and street address that we have on file. Once you save the info, your OnSIP account’s billing contact will instantly update.
The OnSIP Web App: Phone Calls, Billing Tools, and Much More
With the addition of hosted VoIP billing management tools into the OnSIP web app, we hope that account admins will be able to quickly address any account billing issues that come up without having to leave the app dashboard to log into the Admin Portal. They can make any necessary billing changes right in the app itself and go on with their workdays, making calls and holding video conferences.